New Tools
Hi again all. New tools! Woo hoo! LOL!
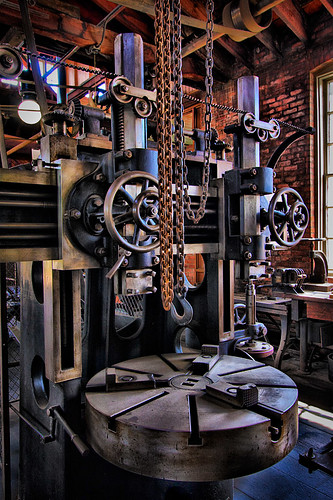
First off though, the image above is of a machine I shot at The Henry Ford Greenfield Village. I love that place! You can click on it to go to my Flikr account and see it at the full posted size, which I think is better.
So anyway, a couple months ago, I got an offer from Adobe to upgrade my Photoshop CS3 with the NEW IMPROVED Photoshop CS4. I read up a bit on the new version, and decided it had enough new stuff that I wanted it, and whipped out the old plastic.
What I didn't realize at the time was that the product wasn't quite ready for prime-time. I had PRE-purchased my upgrade and had to wait. Bummer. :>(
But the wait wasn't too bad, and a couple weeks ago, I got the email saying it was ready for download. Between then and now, I've been checking it out, with lots of help from my favorite learning resource: www.Lynda.com and I'm really liking it a lot.
By the way, if you're looking for Photoshop training, at ANY level, go there and find trainer: Deke McClelland. Deke is THE MAN when it comes to Photoshop knowledge and training. Seriously. Guru. Awesome.
So, someone asked me what I thought about it the other day, and I went ahead and wrote it up. Then I thought I'd go ahead and share it with you folks here on my blog as well.
Most of you probably aren't Photoshoppers, and this post won't interest you much, but for those that are, I hope you'll find this helpful. Photoshop is important to me because of my photography mostly, but I also use it to make my cartoons and stuff.
First thing you'll notice in CS4 is that the interface is VERY different, but I'm quickly getting used to it, and liking it. It affords better screen real estate and better tool use, especially in the department of how many ways you can manage pallets (now called "panels" by Adobe). Adjustment layers are on a neat panel now also that I'm really beginning to like too.
Speaking of adjustments, Hue/Sat, Curves and B&W have a new feature that's basically a 'target adjustment tool' (from LightRoom). Just like you sample a color or luminance level with the eyedropper, you use this tool to target, grab and drag to increase or decrease in a way that ONLY affects the color or hue or luminance or whatever (depending on the adjustment feature you're using at the time). VERY cool!
Another new panel is a Mask Panel, and I use masks a lot, so this is real handy to me. It works exclusively with one layer at a time, so you have to be sure you're on the right layer, but that's great because it DOESN'T see all the other layers that you DON'T want to be affected by the new mask, like in the older channels pallet that was so great for making masks - this is even better because of that alone. But it gets even better: With it you can go straight to "color range", feather, density, and so forth right there in the panel.
The new adjustment and mask panels even have a clip button now - not a huge improvement over Alt/click between layers, but it's one step quicker, and no need to go to the keyboard, even for an instant just to do that when you're already mousing IN the panel to make your adjustments.
All the different panels available, from type to colors to channels to history to whatever can be independently dragged around and put together into whatever kind of pallets/panels work best for you. You can group them any way you like, and park them anywhere you like, move them around the screen, easily collapse them temporarily and pop them back out - all without going up into the menus to make any choices, unless you want to pull out a panel you haven't been using at all, so it's nowhere on your desk window.
Part of the new interface is that all your open photos are on tabs that you can drag into whatever order you want, or even drag it out of or back into the tabs to a floating window of its own, and there's a handy button to arrange the windows instantly to pretty much any way you want, using one photo at a time, or two, or three, or whatever, and there are a bunch of different configuration to start with right there on the button flyout. Then you can line them up if you like, and lock them to move together in harmony so you can easily compare them one against another just by moving one of them.
There's a BUNCH of that kind of control you can use now.
Smart Objects have gotten way smarter too in one big, major way. Smart object masks can now be locked in so that they move in sync with the image they're masking, even if you start doing wacky things like full blown distortions to it that image, like warping and whatnot.
Dodge and burn got REAL awesome in this version with seriously improved toning tools. (sponge improved too, but not as much) There's a checkbox labeled "Protect Tones" and it REALLY takes care of business. Dodge and burn used to basically destroy the image as you used them, and you had to be REALLY light-handed to work with them in good ways. It was like throwing chalk or mud at the image. Now, you can go CRAZY with them and get great results.
I've always used the bracket keys to increase and decrease my brush sizes, and shift bracket to change the hardness, and you sort of guess how that's going to work out a few times to get where you want to be. Now, you can also hold down the Alt key, then right drag in the image to size the brush to taste, and it gives a ruby lithe mask temporarily to see what it will look like to paint or erase or whatever with it. Shift Alt does the same, but adjusts hardness. That's how it works on my PC - According to Deke, it's different on a Mac. Anyway, that's pretty neat too - lots more visual input to work your brush sizes better than try, Ctrl Z, try again, Ctrl Z, try again, etc. I like it, anyway.
Camera RAW 5 has a WHOLE lot of cool tools that look REALLY handy in Deke's training course, but I haven't worked with it yet. I'm so used to working in Lightroom... Anyway, it looks like something I should definitely start working with.
Enhanced navigation ROCKS. No more 'bad' quality views at mag levels other than 25%, 50% 75% and 100% either - they're ALL good now, whatever your zoom level is. Zoomed in all the way to pixel level, each pixel has a thin little box around it so you can tell EXACTLY what you're working with - that's really neat. And you can zoom in and out by holding Z and just clicking and holding where you want to zoom to; Alt Z hold click zooms you back out.
Hold H and click down and you suddenly see the whole photo, with a square wherever your mouse is, so you can nav to a new point on the image. Let up the mouse button, and you're zoomed back in on that spot at the previous zoom level. No need at all any more for the navigation pallet.
Grab the hand tool, and you can 'toss' the image, like in Google Earth or something. So, you grab it and 'throw' it under your view to get where you want to go quick, while it scrolls by, as fast or slow as you 'threw' it. There's a rotate view tool now too, and you can just rotate to be able to fit areas on the screen better and work with them more naturally. It doesn't rotate the image permanently - it's just the viewer's perspective, and it's on the fly - no waiting or anything like that. It can also help you figure out where and how you might want to permanently rotate and crop an image.
I really love that stuff, and am finding it VERY useful and intuitive. They're using Open GL to increase the display abilities like crazy in those kinds of ways.
Some of the new "wow" things are the ability to stretch or shrink a photo with Content Aware Scaling, and it keeps the 'objects' at the right size, but works the little stuff like grass and sky and what not to make up the difference. Works pretty well, from what I've seen, and you can apply masks on areas to make SURE to preserve them intact before you transform it.
Another "wow" is the Auto DOF that allows you to throw several photos taken with the focus at different places and it combines them into one that's focuses throughout. This is especially handy for macro photographers, because you just can't get the Depth of Field at intense magnification. So, you shoot it several times, shifting the focus slightly between each, and let PS do the work.
That works best on a tripod, but the PhotoMerge and Auto-Align tools are better than ever. That shit's amazing.
Most of the other 'not new' tools seem to have also been improved in one way or another, from response times to better previews, to more functionality, etc.
In short, I'm loving it. Well worth the upgrade to me.
posted by Buckster @ 4:21 PM
0 comments
![]()
![]()

0 Comments:
Post a Comment
<< Home